Integration Guide:
Widget when Real Time Tracking is Available
This guide explains how to integrate Bettermile's real-time tracking widget into your website. By embedding the widget, you can create a co-branded tracking experience while leveraging Bettermile's advanced real-time tracking capabilities:
- Frontend Integration: Embed via iframe or JavaScript.
- Customizable: Adapt language, color scheme, and style. Contact Bettermile for support with customization.
- Controlled Access: Display the widget only for parcels with real-time tracking availability.
Integration Steps
-
Determine Availability:
Check when a parcel becomes trackable and enable the widget. Two integration options are available:
- Pull Approach: Use the Availability API to check when real-time tracking becomes available (see the sequence diagram below).
- Push Approach: Automatically receive parcel availability updates in your backend via webhook .
-
Conditional Widget Display:
Display the widget only when
trackingIDavailability status istrue. For parcels not yet trackable, show their current status (e.g., "Ready for delivery at depot"). A detailed integration guide is available on the Better Tracking Widget page. -
Secure Access:
Either by
- Configuring a proxy endpoint under your domain to forward widget requests to the tracking endpoint or
- Cross-Origin Resource Sharing (CORS). Contact Bettermile to whitelist the domains of your host website. Note that this may expose Bettermile to potential Cross-Site Scripting (XSS) vulnerabilities on your domain. Therefore, we recommend using the proxy option instead.
Sequence Diagram
The Better Tracking Widget allows you to embed the bettermile tracking experience into your website for tours driven with Better Route.
The Widget can be integrated in one of two ways. Via an iframe integration or using an Javascript library.
Authorization
Implementation
Iframe
<iframe width="400" height="800" src="https://gls-rtt.com/widget.html?disable5StarRating=1#/gls-de/de/534340433"></iframe>Javascript SDK
<html>
  <head>
    <script type='module'
            src="https://gls-rtt.com/widget.js?containerId=trackingContainer&disableFromAddress=1#/gls-it/en/5/12345">
    </script>
    <link rel="stylesheet" href="https://gls-rtt.com/assets/style.css">
  </head>
  <body>
    <div id="trackingContainer"></div>
  </body>
</html>
or render programmatically once the script is loaded or when some event has occurred:
<html>
  <head>
    <script type='module'
            src="https://gls-rtt.com/widget.js?autoRender=false"
            onload="window.betterTracking.render('/gls-de/en/534340433/12121', {containerId: 'myContainerId1', disableFromAddress: 1})">
    </script>
    <link rel="stylesheet" href="https://gls-rtt.com/assets/style.css">
  </head>
  <body>
    <div style='max-height: 400px' id="myContainerId1"></div>
    <div style='max-height: 400px' id="myContainerId2"></div>

    <script type='module'>
      setTimeout(() => {
        window.betterTracking.render('/gls-at/de-AT/12334566/10115', {
          containerId: 'myContainerId2',
          disableFromAddress: 1,
          disableToAddress: 1
        });
      }, 10000);
    </script>
  </body>
</html>
URL Structure (1st function parameter)
Uses the url structure of the gls rtt page: /{tenant-id}/{locale}/{parcelNumber|trackingId|internalId}[/{postcode}] The postcode is optional.
The locale parameter uses the IETF language tag format, which is a lowercase language code, followed by an optional region (usually a two letter ISO country code), separated by a dash.
For example: en, en-US, de, de-AT.
Parameters
In Iframe mode you have to pass a hash string and query parameters. In Js Library Mode you pass the hash string as first parameter and the query parameters as object in the second function parameter.
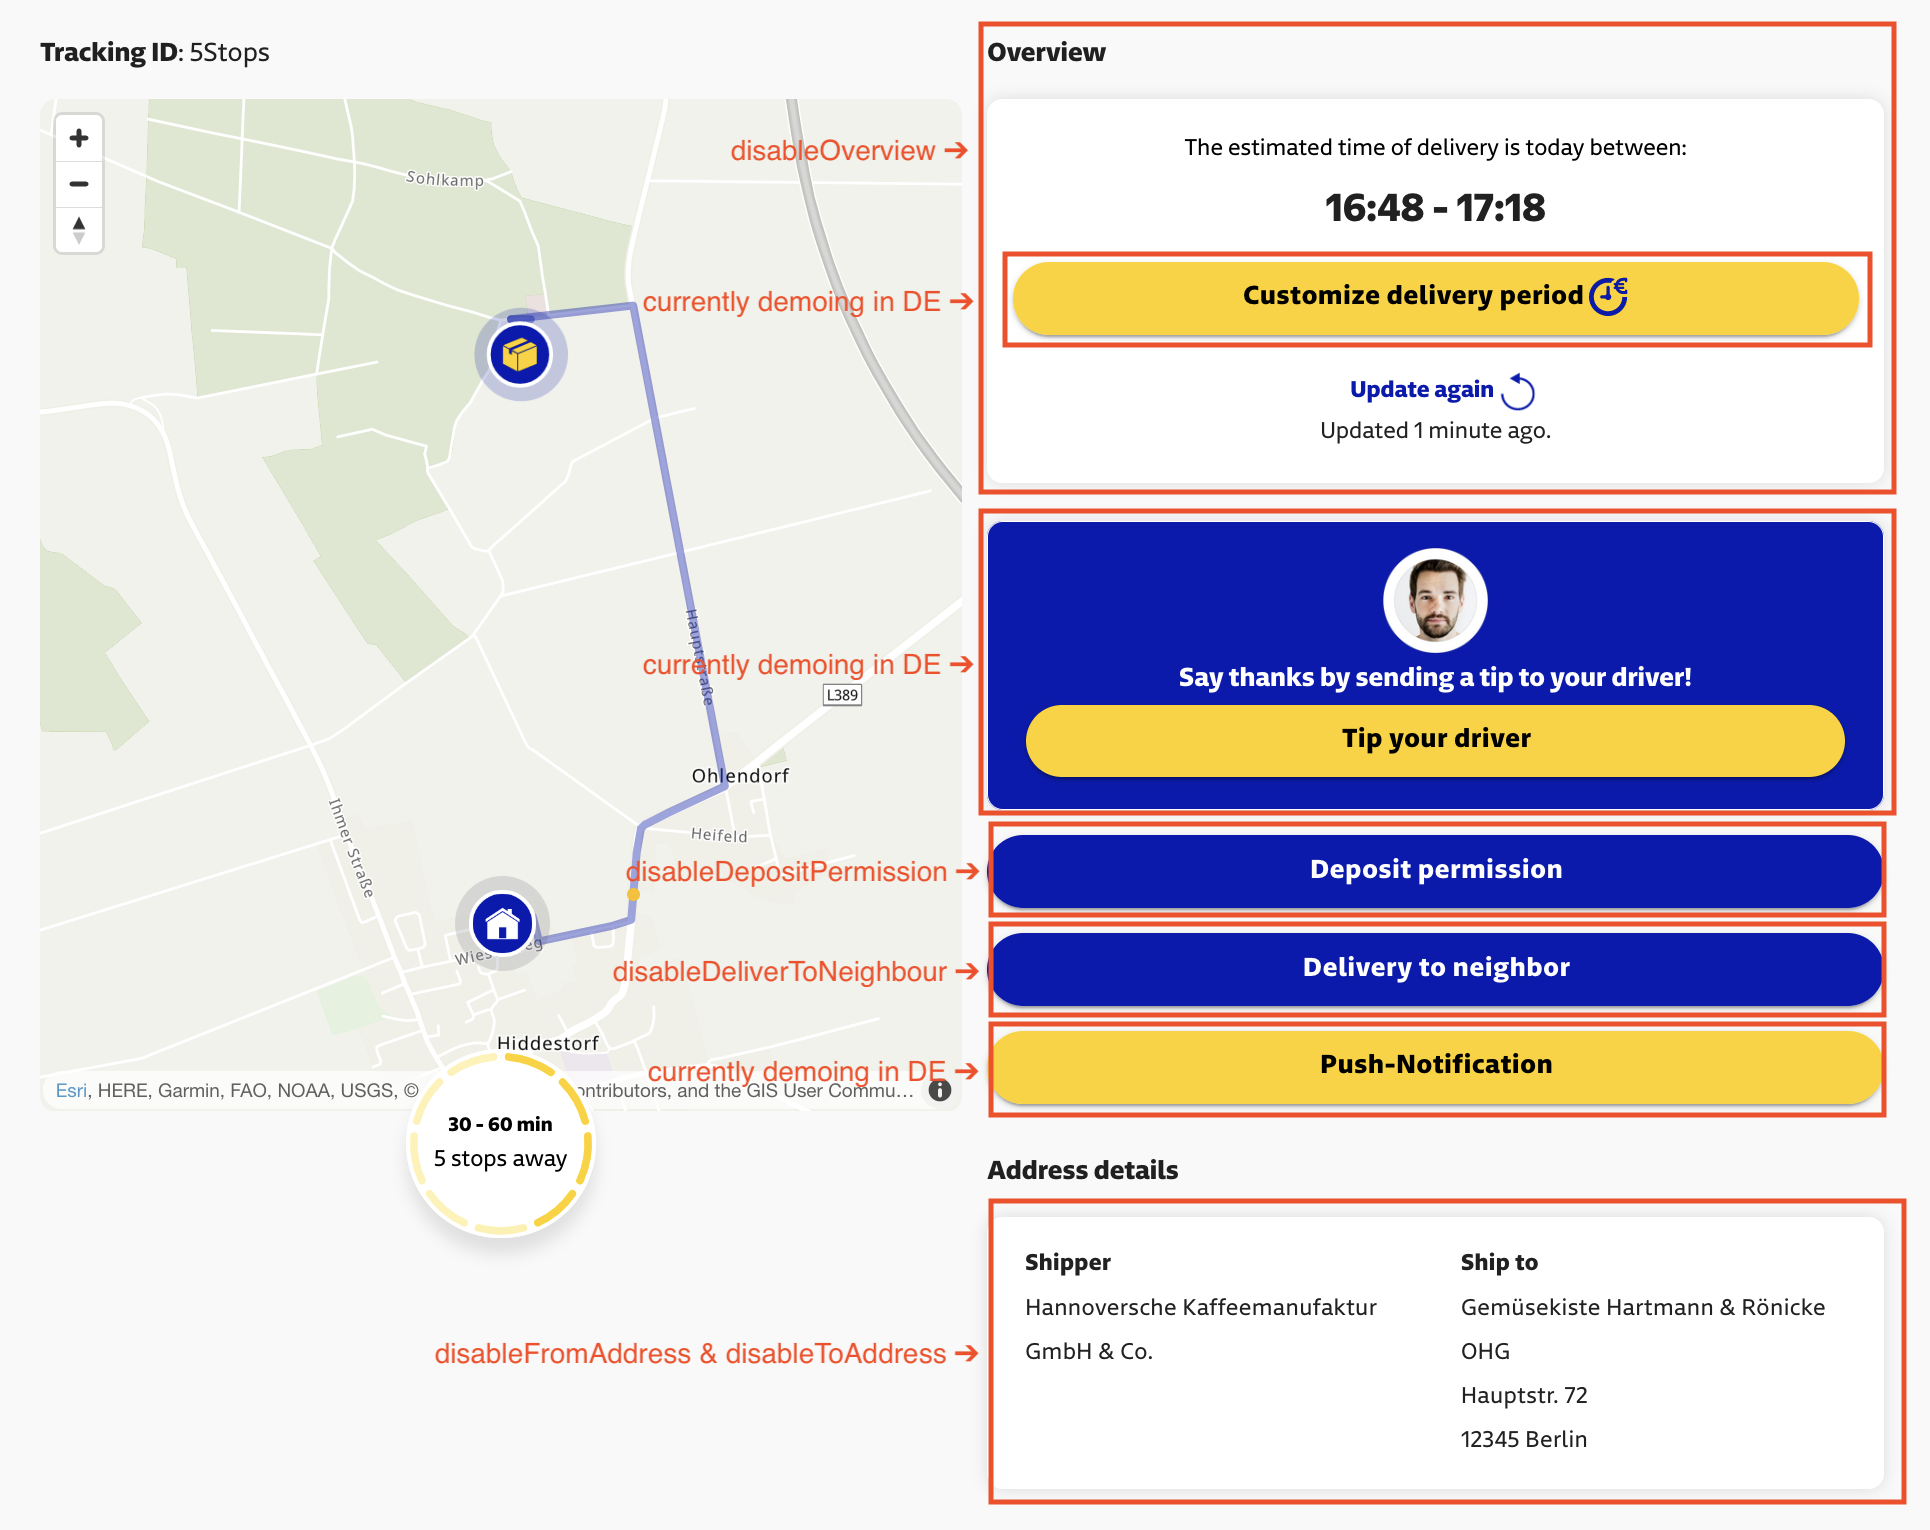
Parameters visualized
Widget view at estimated 5 stops before delivery:
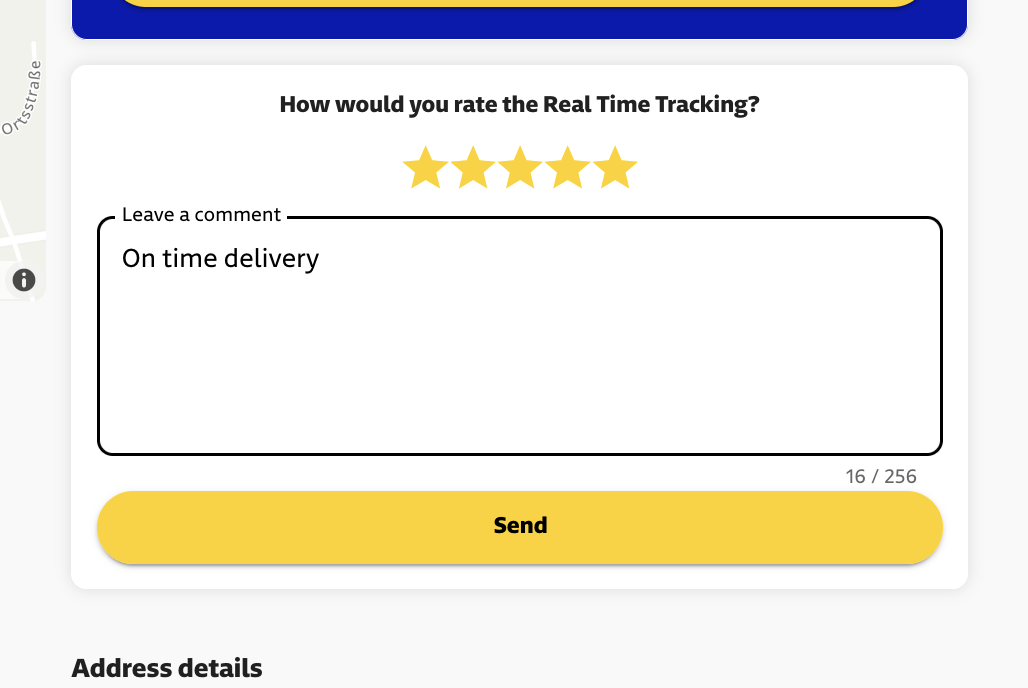
Rating Box on Delivered State (disable5StarRating):
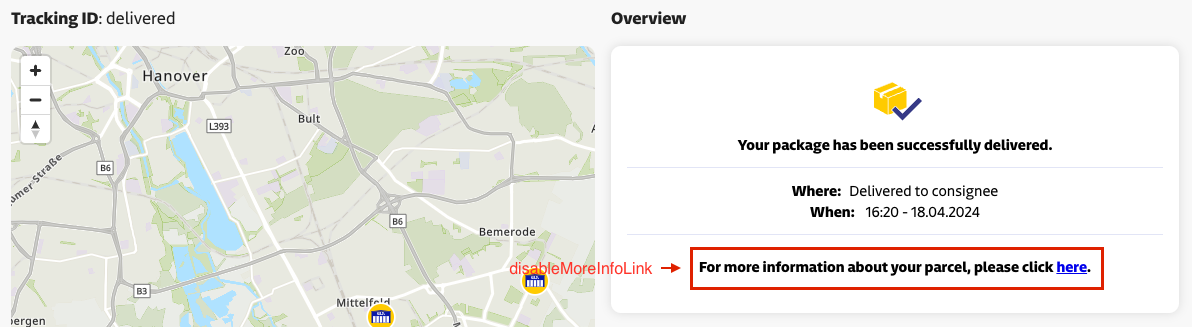
Widget view when parcel has been delivered:
Query Params (2nd function parameter)
| Name | Type* | Default | Description |
|---|---|---|---|
| autoRender | boolean | true | defines if the vue application should be rendered on startup |
| containerId | string | rtt | defines in which element the vue application should be rendered into |
| disable5StarRating | boolean | false | defines if the rating component should be shown |
| postCodeTextInput | boolean | false | defines if the postcode can contain alphanumerical characters |
| disableDepositPermission | boolean | false | do not render deposit permission button / dialog |
| disableDeliverToNeighbour | boolean | false | do not render "deliver to neighbour" button / dialog |
| disableFromAddress | boolean | false | do not render fromAddress |
| disableToAddress | boolean | false | do not render toAddress |
| disableOverview | boolean | false | do not render the overview, only the map |
| gdprApproved | boolean | false | do not prompt for gdpr approval |
| disableMoreInfoLink | boolean | false | do not show the link for more info, when delivered |
| trackingApiUrl | string | API URL for the tracking data |
All query params are optional