Upload to AWS S3
Better Route accepts a generic JSON file format to import address data (also referred to as "master data"), assignments (data assigned to users, vehicles, etc.) and status updates (changes in the status, e.g. a parcel was delivered to the customer).
The files should be compressed and will be uploaded to an AWS S3 Bucket for import into Bettermile Data Gateway (DGW).
File name conventions
There is no required naming structure for files, although following a certain convention helps in working with them, e.g. for debugging purposes. Therefore, it is recommended that files adhere to the following naming scheme:
-
<tenant-id>-<data-type>-<depot-id>-<YYYY-MM-DD-HH-MM-SS>-<random-alphabetic-letters>.json|gz|zip|tar.gz-
<tenant-id>: a short agreed upon name for the customer/tenant. -
<data-type>: this may be "master-data", "assignment-data" or "status-updates", but this is entirely descriptive and can also be more closely reflecting the actual tenant specific structuring of the data. -
<depot-id>: optional identifier for the depot if something like this exists. This is also only descriptive. -
<YYYY-MM-DD-HH-MM-SS>: date and time when this file was generated. -
<random-alphabetic-letters>: to disambiguate files created in the same second. -
<json|gz|zip|tar.gz>: multiple compression options are available. We strongly recommend to compress files, see below. Any file ending other than gz, zip or tar.gz will be treated as plain JSON in UTF-8 encoding.
-
File sizes, packaging and compression
Files can have any size up to 10 MB. This limit is large enough for all foreseeable needs. Files bigger than the upper limit will be ignored instead of being imported.
Files should ideally be not too small. E.g. they should not just contain data from one driver or vehicle but from as many as possible of them.
A file may contain address, assignment and status update data all in one, or the different data types can be split into different kinds of file.
The content must be valid JSON conforming to the Data & Delivery schema and encoded in UTF-8. Each object can be inside a top level array or concatenated next to each other.
We strongly recommend to compress the files either as:
- gz: Gzip compressed files (the preferred choice)
- tar.gz: compressed tar archive with just a single file entry (only the first one will be processed)
- zip: compressed file in zip format with just a single file entry (only the first one will be processed)
Status update files can be sent in regular intervals (for instance one per minute). Ideally only one file at a time, but may also be split into multiple files for each depot or depot group.
Uploading files to AWS S3
Bettermile will provide the following to the tenant:
- AWS S3 bucket : an S3 bucket identified by a unique URL for the respective tenant.
- AWS Console Login URL : a URL for logging into the AWS console, to generate access key ID and secret access key.
- AWS username : username for AWS console log in.
- Temporary Password : a one-time password for logging into the AWS console, that the tenant will be requested to change after the first login.
The tenant will be able to put, list and read files in its bucket. Only the tenant and the Bettermile division will be able to access the S3 bucket. The tenant will not be able to navigate to this bucket from the AWS console, due to strict permission, they can however access the AWS console bucket page from its URL.
There are multiple ways to upload files to AWS S3. It can be done on the command line, with a REST API or using the various AWS SDKs targeting different programming environments: https://docs.aws.amazon.com/AmazonS3/latest/userguide/upload-objects.html
Upload via AWS Console:
- Sign in to AWS console
-
Access the bucket by URL:
https://s3.console.aws.amazon.com/s3/buckets/<bm-route-dgw-sample-bucket-name> - Upload files manually with the "Upload" button.
Upload via CLI / Terminal:
- Install AWS CLI .
-
Set up your AWS credentials
with
aws configure. -
Upload files to S3:
aws s3 cp <PATH_TO_FILES> s3://<BUCKET_NAME>.
How to create AWS access key ID and secret access key
Tenants will receive the following from Bettermile:
- AWS Console Login URL
- AWS username
- Temporary password
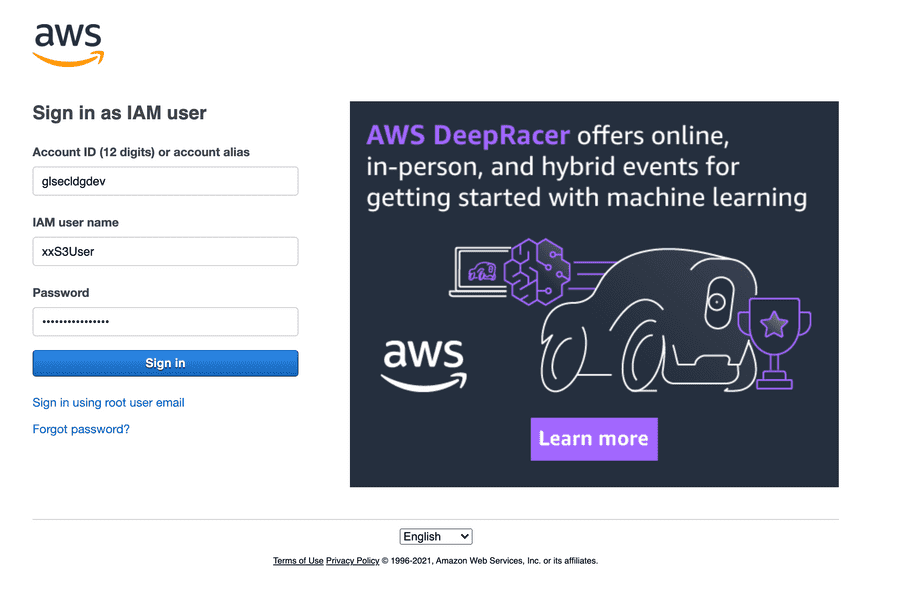
Step 1: Login to AWS Console Login URL with provided username and temporary password
Step 2: Change Password (only 1st time)
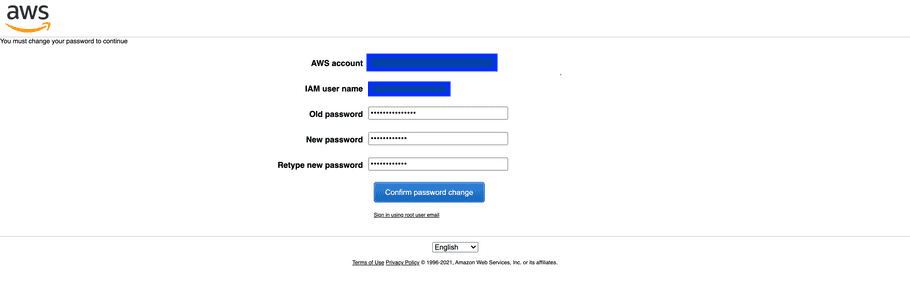
Once you log in for the first time, you will be asked to change console password:
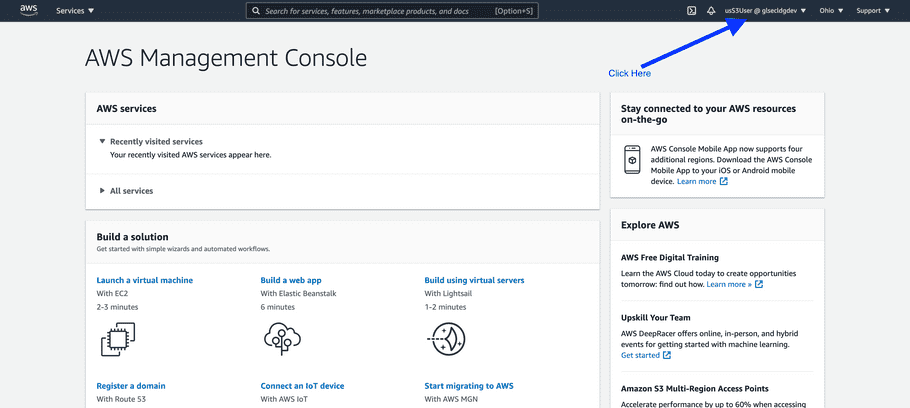
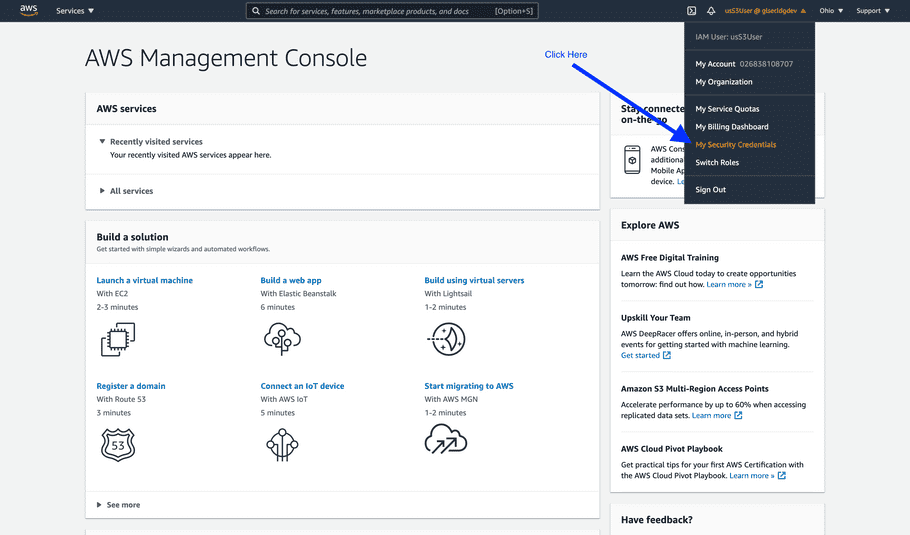
Step 3: Go to “My Security Credentials”
After logging into the AWS console:
then:
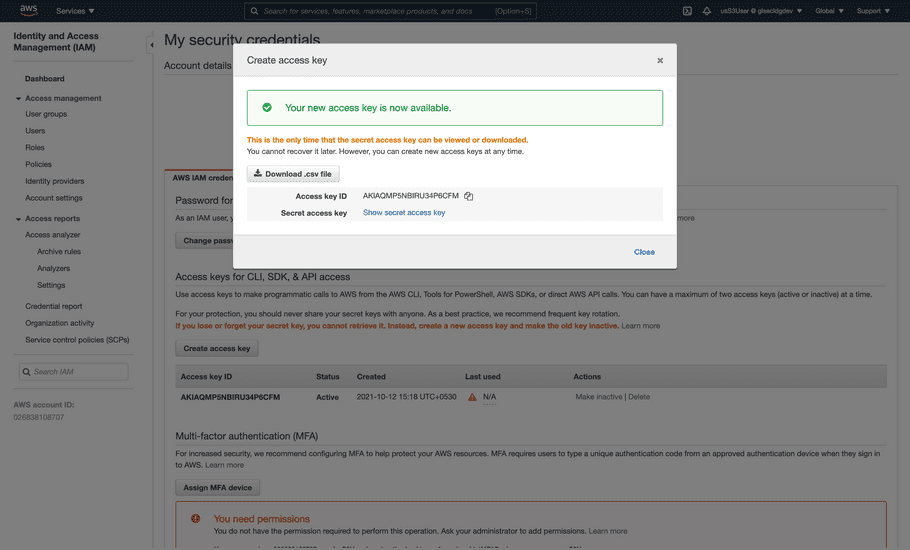
Step 4: Create access key
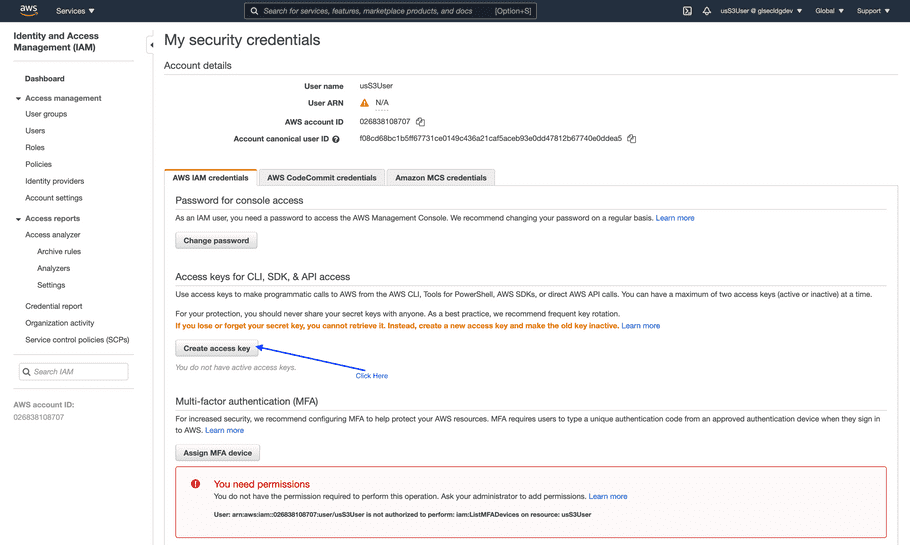
Note: Once the access key is generated, make a note of it or download it as it can not be viewed again. However, you can create a new one if you need.
